This guide goes over some advanced features that aren't necessary to use. It assumes you've read the Installation Guide first. It also assumes your version of Strawberry Starter is 1.1.0 or higher (check package.json to see your version).
Navbar Links & Editing
You already know you can tag a post navbar to add it to the navbar. What if you want to add links to other sites, or even images?
No worries - go to _includes/navbar.html and you can add new HTML in there easily, without having to mess with the whole layout. Some examples are provided in comments, as well as a minifeed example.
Minifeeds
These are sort of a mix between blogging and social media posts. You'll find a folder called minifeeds in src. You can organize your feeds any way you like - the only thing that joins them together is that every post has the same tag. By default, feed posts do not appear in All Posts or clog up the RSS Feed; they only appear in the All Posts tag view. You can directly link to them though - they'll appear at sitename/tags/feedname/. I would link to them in your index or navbar! An example minifeed - updates - is already included with Strawberry Starter. Look over it for a better understanding of what to do.
Comments
You'll need an external comment service like Disqus or CommentBox. Copy and paste the script they give you into _includes/comments.html. Comments only appear on posts.
Backing up your blog
Type npm run backup in your command line. You'll see a new _backup folder appear. This folder has the bare minimum essentials in it, to save on storage space. If you want to make use of it, you'll need to download Strawberry Starter again and paste the _backup folder into it.
This is also a convenient way to upgrade versions!
A full list of what is backed up:
- Your config file in
src/_data/config.jsonc
- Your navbar links in
src/_includes/navbar.html
- Your comment script in
src/_includes/comments.html
- Everything in
src/assets/
- Everything in
src/info/
- Everything in
src/posts/
- Everything in
src/minifeeds/
- Your
favicon.ico
- Your
index.md
- Your
social.png
This notably does NOT backup your .env.local, for security reasons. You'll have to manually add that again.
Some answers for miscellaneous issues or concerns:
The dev server is acting strangely / not showing updates!
Are you on Windows? The 11ty dev server isn't perfect - things can look weird sometimes. Regardless of operating system - if you notice anything odd, my advice is to stop the dev server, and then start it again. If that doesn't fix anything, try manually deleting _site, rerunning npm run dev, and doing a hard refresh of the page with CTRL+SHIFT+R.
How can I change the date format?
Go into eleventy.config.js and you'll find two filters, lastUpdate and dateFormat. The former controls the last modified indicator at the bottom of your blog, and the latter controls the date that appears next to posts. If you're familiar with JavaScript, you can edit the return value yourself, but if not, there are some presets you can switch to. For example - if you wanted the post dates to appear in month/day/year format, just change return DMY; to return MDY;.
This is cool, but I want to tinker with it...
I recommend a few starting places:
- MDN Learning
- In addition to being a great reference for HTML, CSS and JS, the Mozilla Developer Network also has a bunch of tutorials, if you're not familiar with them. They range in experience level from "how to open a code editor" to "how to make your own videogame".
- In my opinion, the best resource for learning web development online.
- 11ty Tutorials
- The videos here do a great job explaining the basics of 11ty: making files with tags and iterating over collections.
- They mostly scratch the surface, but it's good to start here and then search what you want to do. 11ty is very basic out of the box, but you can extend it a lot, usually by editing
eleventy.config.js.
How can I back up my blog, or add comments?
Check out the Advanced features guide.
I have a question not answered here.
Try making a comment on the itch page, opening an issue or pull request on the Github (if you know how to do that) or, alternatively, feel free to reach out to me on social media or email. Or if you just want to show me a cool blog you made 😊
This post is a showcase of how to write Markdown, featuring various examples of the elements you can create. Open this post in a text editor so you can see exactly how they've been added.
Additionally, I also recommend reading a Markdown guide like this one, or at least having it handy, so you can consult it when necessary.
Headings (this is level 1)
Heading level 2
Heading level 3
Heading level 4
Heading level 5
Heading level 6
Paragraphs
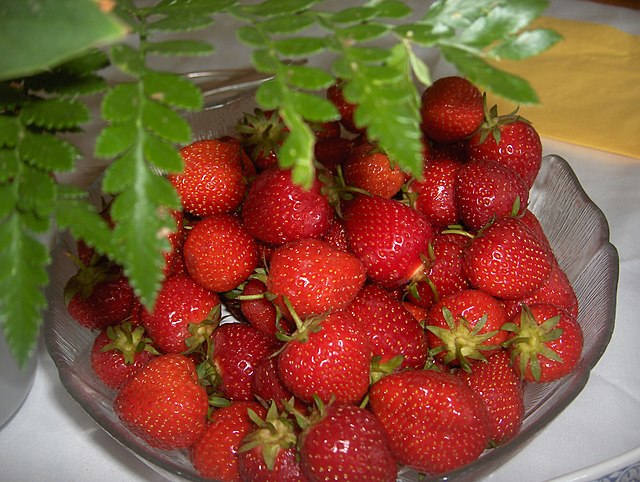
Strawberries are sweet and yummy, but so are some other things:
Halvah oat cake fruitcake dessert chocolate cake. Croissant cake marshmallow bonbon shortbread candy canes dragée chocolate caramels. Toffee toffee wafer croissant chocolate cake sugar plum liquorice apple pie. Cupcake lemon drops sweet pie cake brownie. Tart brownie biscuit danish sweet roll. Sugar plum cake donut toffee caramels bear claw jujubes. Cake halvah toffee bear claw jelly beans. Toffee jelly beans gingerbread brownie sesame snaps chocolate cake brownie danish biscuit. Sweet cupcake sweet roll powder muffin.
Fruitcake dessert marshmallow cake oat cake caramels jelly. Cake marshmallow carrot cake fruitcake muffin gingerbread tootsie roll sugar plum. Bonbon pudding wafer powder halvah lollipop dessert. Jelly-o chocolate bar cake topping cotton candy cotton candy halvah powder.
If you want line breaks
Just add two spaces
At the end of your sentence
Strong Text and Emphasis
You can use double asterisks for strong text, and single asterisks for emphasis.
Those will usually show up as bold and italics, but themes/custom styling can override that!
You can also use triple asterisks for both of them.
Blockquotes
This is a blockquote!
Blockquotes are quite neat
You can do many things with them.
- As you can see, you can put other elements inside them.
They sure are a lot of fun.
Lists
Names for "Strawberry" in a few languages:
- "morango"
- "fresa"
- "fraise"
- "jagoda"
- This is also a list
- However
- It's unordered
- I think it's still cool
- Don't you agree?
- You can also use an asterisk.
- You can even mix the two!
Code Blocks
If you need to code, you can use backticks.
# you can also create fenced code blocks
# for multiline stuff
if (strawberry) {
    console.log('yum!');
};
Links
To create a link, like, for example, one to my site, just use square brackets for the text, and round brackets for the URL.
Images
Images are fundamental to any blog, right?
It's similar to the link syntax, except the square brackets are for alt text, and the round brackets are for the file path. Also, don't forget the exclamation mark!
HTML
Finally, when Markdown just doesn't cut it, you CAN write HTML, if you really want to. Any valid HTML is also valid Markdown.
You probably don't want to write HTML! But it does mean you can paste things in your posts like, for example, Youtube embeds!
That's it for this post! There's more you can do, but I think this covers most use cases. Be sure to read a full Markdown guide!
This page explains how to do various things. You can find more step-by-step instructions in the installation guide, but here information is presented more simply for quick reference.
How to use your blog
- (Optional) Run the live preview server
- In a terminal that's navigated to the Strawberry Starter folder, type
npm run dev.
- Open a browser and go to
localhost:1234.
- You can now preview your changes live!
- Adding or editing a blog post
- Navigate to
src/posts/ and make or edit a .md (markdown) file.
- You can name .md files whatever, but keep in mind that the filename will be the URL to the post.
- Building your changes
- In the terminal, stop the development server by pressing CTRL+C
- Execute the command
npm run build.
- Your site is now built and ready for export in the
_site folder!
- OR, you can upload directly to Neocities with
npm run upload! Requires some setup - see installation guide.
Anatomy of Config.jsonc
siteName
- The name of your blog. Appears on the footer, the RSS feed, and the link preview (i.e. the little image when you link to a site on social media or discord, etc).
siteDescription
- A small description of your site. Appears on the link preview and RSS feed.
siteURL
- The public URL of your blog, e.g. (example.neocities.org) Needed for the link preview and RSS feed to function correctly.
siteAuthor
- Your name. Appears on the footer.
siteLang
- A two-letter code indicating what language your blog is in. Used internally for various things.
authorLink
- A link to your personal website or social media or etc. Appears on the footer. You can leave this blank if you prefer.
authorContact
- Your email. Appears on the footer. You can leave this blank if you prefer.
siteStyle
- The theme used by your blog. Themes are in located
src/assets/styles/themes/. You can use (or edit) one of the premade themes, or create your own if you know CSS.
siteSubDir
- Set this only if you want to upload your blog to a subdirectory.
- e.g. - set this to
/blog/ if your site will be at example.org/blog/ instead of example.org.
- This setting will change all the links on your blog to work with your new subdirectory.
- e.g. When linking images in posts, you can just do
/assets/images/example.jpg, instead of /blog/assets/images/bowl_of_berries.jpg
- ⚠️ Warning: If you're uploading to Neocities and already have a homepage with content in it, BE SURE TO SET THIS!
- Uploading to Neocities will OVERWRITE content like your
index.html !
Commands
npm install
- This installs dependencies that your blog needs to function.
- You only need to run this once, to create the
node_modules folder.
- If that folder is deleted (e.g. you got rid of it to back up your blog somewhere) you'll need to run this command again to build or use the dev server.
npm run dev
- This command starts a development server at localhost:1234.
- It live updates with any changes you make, so it's good to run this while writing to see a preview of your blog.
npm run build
- This command outputs your blog's files to the
_site/ folder.
npm run upload
- This command will build your site (as if you had typed
npm run build), and then upload your site directly to Neocities.
- However, it won't work out of the box. Check the installation guide and the
.env file for more info.
npm run backup
- New in version 1.1.0!
- Backs up your site to a folder
_backup. You can use this backup to upgrade Strawberry Starter versions - just paste the folder into the newer version.
Detailed Folder Layout Reference
Here's an overview of the folders and files in Strawberry Starter. You can ignore most of these and have a perfectly functional blog, but if you're curious and/or brave:
_backup/
- Contains a backup of your blog.
- Created by running
npm run backup.
_functions/
- Contains various scripts run by Node during the site's build and install.
_site/
- Destination folder for your finished site after running
npm run build or npm run upload.
node_modules/
- Contains various Node packages and dependencies.
src/
_data/
config.jsonc
- Contains various variables used throughout your blog.
_includes/
- Contains HTML files that create the layout of your blog.
- These files also use Liquid, a templating language.
assets/
- An assorted folder for storing things like images or scripts or styles. Anything placed in this folder will automatically be copied over to
_site/ when you run the build or upload command.
info/
- Contains pages that will appear on the navbar at the top of your blog. By default, you have two:
all_posts and about.
- If you want to add a new navbar section to your blog, add a .md file here.
posts/
- Contains blog posts.
- If you want to add a new blog post, add a .md file here.
minifeeds/
- Contains additional posts that won't appear in "All Posts" or the RSS Feed - only the tag view.
utils/
- Contains various utilities, like the tags page.
index.md
- This is the homepage of your blog.
social.png
- This image appears in the preview card used when linking to your blog on social media.
.env
- This is a template explaining what a proper
.env.local file should look like.
.env.local
- This file isn't created by default (for security reasons).
- Putting your Neocities API key here is necessary for
npm run upload to work.
.gitignore
- Files ignored by git. If you know how to use git, then this is useful to you. If not, don't worry about it.
eleventy.config.js
package.json
README.md
- A very simple explanation of how to use your blog.
- This also contains a changelog detailing bug fixes/changes.
- You can see what version you're on by checking
package.json.
Since you looked, if you're really curious... why not go to the 11ty homepage and learn even more about how it works? This template is pretty basic and only scratches the surface. A warning, though - if you want to do something really complicated, you're probably better off starting from scratch!
Node
Strawberry Starter was made with Node version # 20.18.1. Running on lower versions may cause bugs.
You can see your Node version by typing node -v into a command line.
Here's how to get started with your new blog:
- Download & Unzip Strawberry Starter.
- You can grab it from itch.io or Github.
- Unzip it wherever - you can move the folder around later without issues, so don't worry.
- Download & Install Node.
- Node is a javascript runtime that lets you create things for the web.
- Grab it from the Node website.
- Note: If you've already installed Node, be sure to update to the newest version.
- Open a Command Line in Strawberry Starter's folder
- Never used one? It's a program that lets you type computer commands.
- 🪟 Windows: Powershell is built-in, and what I recommend you use. If you're familiar with the "Command Prompt", that'll probably work, but it's not recommended for a variety of reasons.
- 🍎 macOS: The program is just called Terminal. Simple!
- 🐧 Linux: You definitely have it, but it's called something different depending on what kind of Linux you're running. Search for "Terminal" or "Shell".
- You can probably open your chosen command line in the folder by right clicking the open folder and selecting "Open a Terminal", but if not, open one of these programs and type
cd path/to/template/, where path/to/template is the full path you unzipped Strawberry Starter to.
- Execute the command:
npm install
- You'll see some output, and probably some warnings and notifications. Unless you see a big ERROR, you should be okay.
-
🪟 On Windows: You might get a Powershell error here! If it says you don't have permission to run scripts, then copy and paste this command:
-
Set-ExecutionPolicy -Scope CurrentUser -ExecutionPolicy Unrestricted
-
You can right click -> paste this, or paste it with CTRL+SHIFT+V. Beware: command lines are finnicky and won't let you copy or paste with the usual shortcuts!
-
Then, try npm install again.
-
If that doesn't work, try again, but running Powershell as admin.
You only need to run npm install once to setup. Now you're ready to start blogging!
Starting the development server
There's a live server you can run to preview your changes as you make them. It's super convenient!
Start the server with the command npm run dev. Now, open localhost:1234 in your browser.
This is a preview of what your blog looks like, and it'll update automatically as you save files.
🪟 On Windows: You might see a firewall permission prompt. Allow the script to bypass the firewall, or it won't work.
Renaming & customizing your blog
Go to the src folder. This is where your blog's files live.
There's a lot of stuff here, but you don't need to worry about most it! For now, let's go to _data and open the file named config.jsonc.
A brief aside about JSON
If you've never seen a .json or .jsonc file before - don't worry, it's not complicated! It's just a way to store text so that it can be easily read by programs. The format of JSON is pretty simple: a bunch of keys and values, paired like so: "key": "value",. These keys and values are contained within two {curly braces}, which you'll see at the start and end of the file.
Note the quotation marks and the comma! All of the key-value pairs (except for the last) must have a comma. The keys and values must also be enclosed with quotation marks. Be sure not to accidentally change that while editing your config file, or your blog will stop working!
config.jsonc contains data that appears in a few places in your blog. Take the time now to replace the defaults, being careful not to disturb any quotation marks or commas or curly braces:
siteName
- The name of your blog. Appears on the footer, the RSS feed, and the link preview (i.e. the little image when you link to a site on social media).
siteDescription
- A small description of your blog. Appears on the RSS feed.
siteURL
- The public URL of your blog, e.g. (example.neocities.org) Required for the link preview and RSS feed to function correctly.
siteAuthor
- Your name. Appears on the footer and RSS feed.
siteLang
- A two-letter code indicating what language your blog is in. Used internally for various things.
authorLink
- A link to your personal website or social media. Appears on the footer. You can leave this blank if you prefer.
authorContact
-Your email. Appears on the footer. You can leave this blank if you prefer.siteStyle
- The theme used by your blog. Themes are located in
src/assets/styles/themes/. You can use (or edit) one of the premade themes, or create your own if you know CSS.
siteSubDir
- Set this only if you want to upload your blog to a subdirectory.
- e.g. - set this to
/blog/ if your site will be at example.org/blog/ instead of example.org.
- This setting will automatically change all the links on your blog to work with your new subdirectory.
- e.g. When linking images in posts, you can just do
/assets/images/example.jpg, instead of /blog/assets/images/bowl_of_berries.jpg
- ⚠️ Warning: If you're uploading to Neocities and already have a homepage with content in it, BE SURE TO SET THIS!
- Uploading to Neocities will OVERWRITE content like your
index.html !
An aside about text editors
You can use whatever text editor you want to edit! I like VS Code or Notepad++, but you can even use Notepad if you want. The only important thing is that it shouldn't be a word processor, like Microsoft Word or Libreoffice Writer.
Making posts
Time to write your first post! Go to src/posts and create a new .md file. You can name it whatever you want, but keep in mind that the filename will become the URL to your post (e.g. post you're reading now is named "installation.md", so if it was uploaded to example.neocities.org, its URL would be "example.neocities.org/posts/installation").
Blog posts start with a little thing called front matter. It looks like this:
---
title: The title of the blog post goes here
date: 2025-12-25
tags:
- intro
- example
---
The title appears as a header on the post page, and also on internal links (on the frontpage's "Latest posts" section and the "All posts" page).
The date is actually optional - if it's not present, the file creation date will be used. This can cause some issues if you backup your posts somewhere and then reupload them - the file creation date might change! I highly recommend you always manually set the date.
Tags are also optional: you can add them to a post to allow users to navigate by tag. If you have at least one custom tag, a tag view will appear in "All Posts".
Create a new post now - give it a title and today's date. When you save the file, you should see it appear on the dev server.
The index and navbar
There are some other pages on your site besides blog posts, though! You'll notice there's a navigation bar at the top of your blog with three links: home, all_posts, and about. These pages are all Markdown files, so editing them is similar to editing blog posts - they're just located in different places:
- The home page (index) is located at
src/index.md.
all_posts.md and about.md are found at src/info.
- Any .md file written in the
info folder will also appear in the navbar!
- It won't count as a "blog post" though, so it won't appear in "Latest posts", or update the RSS Feed.
- If you want, you can instead add a blog post to the navbar by adding
tags: navbar to its front matter.
- In fact, if you've noticed, this very installation guide has such a tag!
If the difference between .md files in
posts and info is confusing to you, don't worry. The main difference is that only posts will appear in "Latest posts" or "All posts", while infos will only appear in the navbar.
You'll also notice an #updates link in the navbar, which leads to a tag view of a bunch of update posts. This is a minifeed - a way to make little posts that won't clog up your "All Posts" or RSS Feed. Kind of like a mix between social media sites & blogging! If you want, you can learn more about this at the Advanced Features Guide, but if it doesn't sound interesting to you, you can just delete everything in _includes/navbar.html.
Favicon and Preview
There are two last things you want to customize:
- The favicon, which appears in the browser tab and bookmarks.
- The link preview, which appears when you link to your blog on some sites, like social media.
Both of these are images you can edit in any graphics editor. Don't change their filenames or formats!
Building and uploading your blog
To get your blog ready for uploading somewhere, go to the command line and type npm run build. (If the dev server is still running, you can stop it with CTRL+C first.) A folder called _site will appear. That folder is your completed blog, and is ready to be uploaded to whatever hosting provider you choose!
Neocities is a cool hosting provider with a free tier! If you're going to use Neocities, Strawberry Starter can instead automatically upload your site there by using the command npm run upload! However, it requires a bit of setup, so follow these steps:
- Go to your Neocities account settings
- Click "manage site settings", then "API".
- Copy your API key.
- If you haven't generated an API key, do so now by pressing the button.
- Keep this safe! Don't share it with anyone, or they can edit your site.
- Open the
.env file in the base of your blog and follow its instructions.
- Don't edit
.env itself! It's just a template of what your .env.local should look like, and should be kept that way to ensure your API key stays safe.
- (Optional) Set a subdirectory
- If you have an empty site and want your blog to live at
example.neocities.org, then you don't need to do anything else.
- HOWEVER, if you already have a homepage at the base of your Neocities, you can instead upload to a subdirectory like
example.neocities.org/blog/
- To do this, change the
siteSubDir in config.jsonc to something else, e.g. /blog/.
- ⚠️ Warning: BE SURE to set this if you already have a homepage! Uploading to Neocities will OVERWRITE content, so if you already have, for example, an
index.html page, npm run upload will replace it with Strawberry Starter's index. Setting a subdirectory avoids this, but just in case, you might want to make a backup of your site before running npm run upload.
- You can easily back up your Neocities site by navigating to the dashboard and clicking "Download entire site".
If you followed the above steps correctly, you should be able to use npm run upload! That command also builds your site, so if you're uploading to neocities this way, you don't need to run npm run build.
All done!
You should now have everything you need for a successful blog!
Go forth and write an introduction post, edit the index and about pages, and upload your site!
Oh - and don't forget to delete the example_posts folder in posts!